> ## Documentation Index
> Fetch the complete documentation index at: https://help.captureiq.ai/llms.txt
> Use this file to discover all available pages before exploring further.
# Create a short link before from sharing in CaptureIQ
When you publish a form in CaptureIQ, you automatically get a shareable link. But sometimes, the default link can look **too long, unbranded, or messy** — making it less appealing to share on social media, emails, or customer-facing platforms.
To solve this, CaptureIQ lets you create a **custom short link** for your form. This makes your form URL **clean, memorable, and professional**, while still keeping the original link fully functional.
 ## **Why Customize Your Form Link?**
Here are some key benefits of creating a short and branded link:
* **Professional Branding**: Replace random characters in the default link with your business or campaign name.
* **Easy Sharing**: Short links are easier to share in social media posts, SMS, or even offline campaigns.
* **Memorable**: A clean, custom link is easier for respondents to recall and retype.
* **SEO Value**: Descriptive slugs (like /feedback or /event-registration) can give search engines more context.
* **Flexibility**: You can update your custom name anytime without breaking older links.
## **How to Create a Custom Short Link in CaptureIQ**
### **Step 1: Publish Your Form**
First, publish your form as usual. You’ll receive a default CaptureIQ form URL.
### **Step 2: Go to Share Tab**
1. Open the published form from your Dashboard.
2. Navigate to the **Share** tab.
3. On the top bar, you’ll see your full form link along with a **Customize** button.
### **Step 3: Customize Your Link**
* Click on **Customize**.
* A modal will open up. Click on the **Edit** button.
* Enter your preferred custom name.
* Save your changes.
## **Why Customize Your Form Link?**
Here are some key benefits of creating a short and branded link:
* **Professional Branding**: Replace random characters in the default link with your business or campaign name.
* **Easy Sharing**: Short links are easier to share in social media posts, SMS, or even offline campaigns.
* **Memorable**: A clean, custom link is easier for respondents to recall and retype.
* **SEO Value**: Descriptive slugs (like /feedback or /event-registration) can give search engines more context.
* **Flexibility**: You can update your custom name anytime without breaking older links.
## **How to Create a Custom Short Link in CaptureIQ**
### **Step 1: Publish Your Form**
First, publish your form as usual. You’ll receive a default CaptureIQ form URL.
### **Step 2: Go to Share Tab**
1. Open the published form from your Dashboard.
2. Navigate to the **Share** tab.
3. On the top bar, you’ll see your full form link along with a **Customize** button.
### **Step 3: Customize Your Link**
* Click on **Customize**.
* A modal will open up. Click on the **Edit** button.
* Enter your preferred custom name.
* Save your changes.
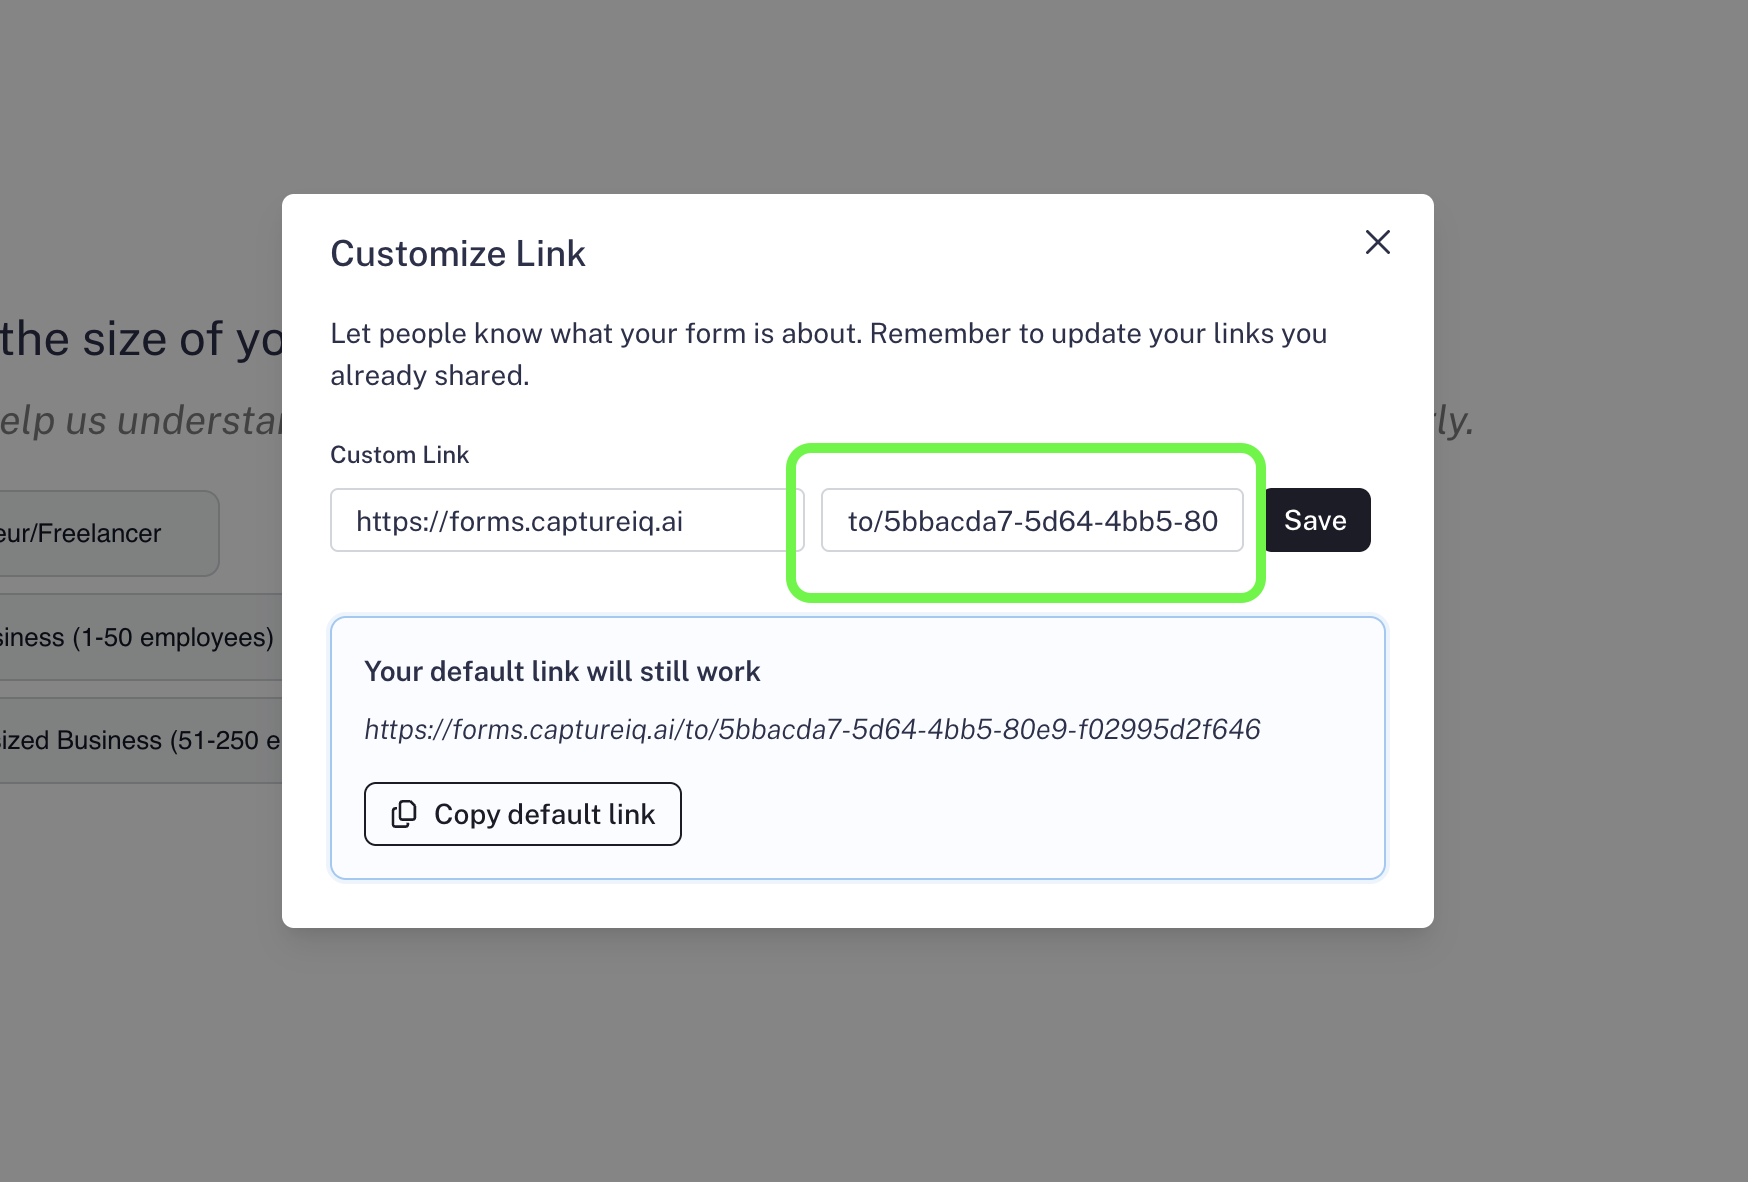
 ## **Important Notes**
* **Default Link Still Works**: Even after customizing, your original long URL remains active. Anyone with the old link can still access your form.
* **Best Practice**: Use meaningful names (like the form’s purpose or campaign name) instead of random words to make your link more effective.
That’s it! You now have a clean, branded short link to share with your audience.
## **Important Notes**
* **Default Link Still Works**: Even after customizing, your original long URL remains active. Anyone with the old link can still access your form.
* **Best Practice**: Use meaningful names (like the form’s purpose or campaign name) instead of random words to make your link more effective.
That’s it! You now have a clean, branded short link to share with your audience.