forms.yourcompany.com/form-id instead of captureiq.ai/form-id).
⚙️ You can manage your domain settings from the Form Settings section inside your organization’s settings panel.
🚀 How to Set Up a Custom Domain
1. Go to Form Settings
- Navigate to the Settings page from the left sidebar.
- Click on the Form Settings tile.
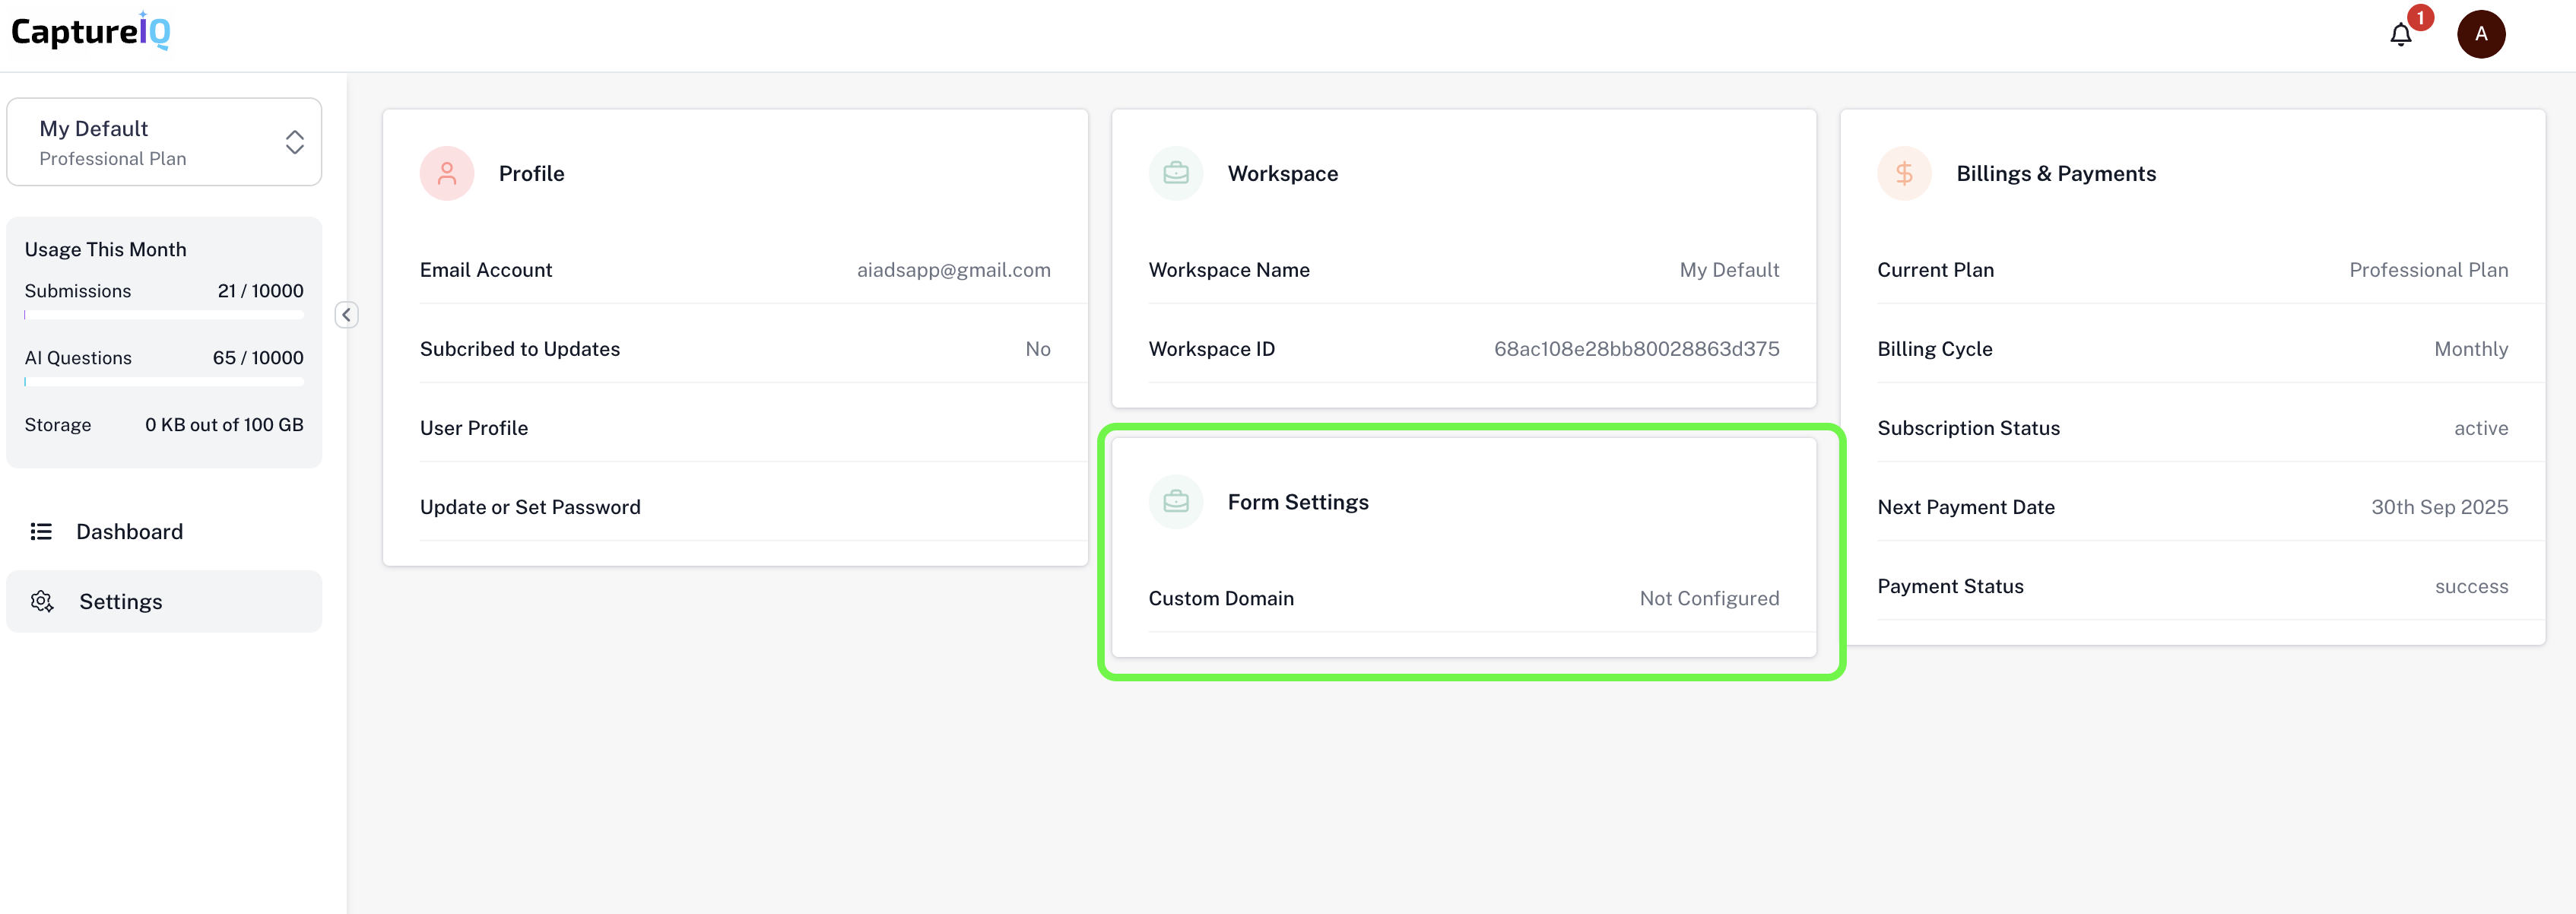
- You’ll be taken to a page where you’ll see:
- Organization URL
- Add Custom Domain input box

2. Add Your Domain
- In the Add Custom Domain input box, enter your desired domain or subdomain (e.g.,
forms.yourdomain.com). - Click the Add Domain button.
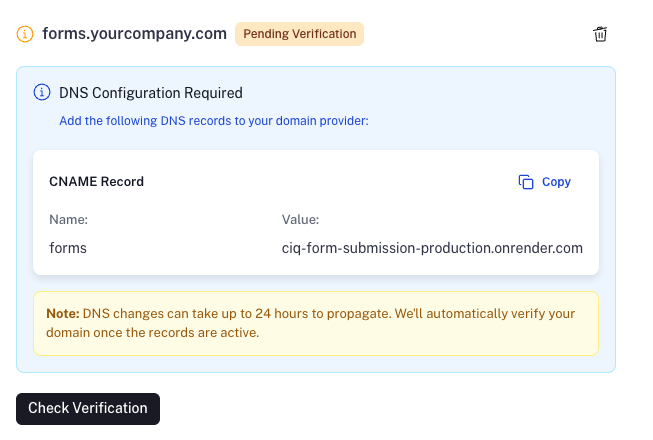
3. View & Add DNS Records
After clicking Add Domain, an information box will appear showing the required DNS records to add to your domain provider (e.g., GoDaddy, Namecheap, Cloudflare). We support both:- ✅ CNAME Record
- ✅ A Record
⚠️ Note:Here’s what the DNS instruction box will look like:
DNS changes can take up to 24 hours to propagate.
We’ll automatically verify your domain once the records are active.
4. Done! Your Custom Domain is Active 🎉
From now on, all published form links will use your custom domain instead of the default CaptureIQ URL.
📝 Even after setting a custom domain, the original captureiq.ai links will still continue to work as a fallback.
🧹 How to Remove a Custom Domain
You can delete your custom domain at any time from the same Form Settings page. Once deleted:- All published forms will revert to using the default
captureiq.aiURLs. - The custom domain URLs will stop working.
✅ Best Practices
- Use a subdomain like
forms.yourdomain.comrather than a root domain. - Set DNS records with a low TTL (Time to Live) for faster updates.
- Ensure your domain is not already in use by another service.
Need help or facing issues with verification?
Reach out to our support team from the chat widget or drop an email to support@captureiq.ai.